Dave Hill is one of today's hottest photographers. For his unreality, his style like some more and others less. But no doubt that, today, his technique is on the lips of many fans to digital imaging. What you'll find below is a humble attempt to reproduce the environment Dave Hill in a few easy steps with Photoshop.
The Starting Point
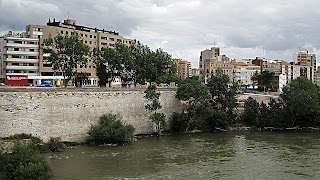
This is the photo that I was leaving. This is a picture of one of the works on the banks of the Ebro in Zaragoza. Before you begin, rescale the picture (is wrong framed ...)

Step 1: Step Height with Intense Light Blend Mode
the following steps:
* Duplicate the current layer (Layer -> Duplicate Layer ...)
* Filter -> Other -> High Pass ... The radio to select depends on the intensity of the effect. You must play with the values \u200b\u200bto make it your own. In my case, I used a radius of 3.8
* In the layers palette, choose the blending mode 'Heavy Light'
* Merge the layers (Layer -> Merge Visible ...)
Step 2: Targeting with Mode Color Fusion
then does the following:
* Duplicate the current layer (Layer -> Duplicate Layer ...)
* Filter -> Other -> High Pass ... Play with the radius to make it your own. In my case, I used a radius of 6.3
* In the layers palette, choose the blending mode 'color'
* Set the layer Opacity to a value around 40%
* Merge the layers (Layer -> Merge Visible ...)
Step 3: Blur and noise
is already. The next step is:
* Duplicate the current layer (Layer -> Duplicate Layer ...)
* Filter -> Blur -> Gaussian Blur ... I used a radius of 7. Again, you can play with different values \u200b\u200bto be left to your taste
* Filter -> Noise -> Add Noise ... You may want to skip this step, but personally, I like the way it is with a little noise. In my case, 3%
* Adjust the layer opacity to a value around 35%
* Merge the layers (Layer -> Merge Visible ...)
Step 4: Unsharp Mask and Final Adjustments
* Filter -> Sharpen -> Unsharp Mask ... Reference values: Amount 90%, Radio 10, Threshold 2
is time to make final adjustments. You might have been a somewhat saturated colors, so you may want to desaturate. You may also want to play with the brightness global image: use the levels tool.
End result:

If you Liais, I leave here a videotutorial